
FDM production
Choose from engineering, specialist and flexible polymers. We plan the build direction, supports and finish around the important interfaces of your component.
Explore FDM production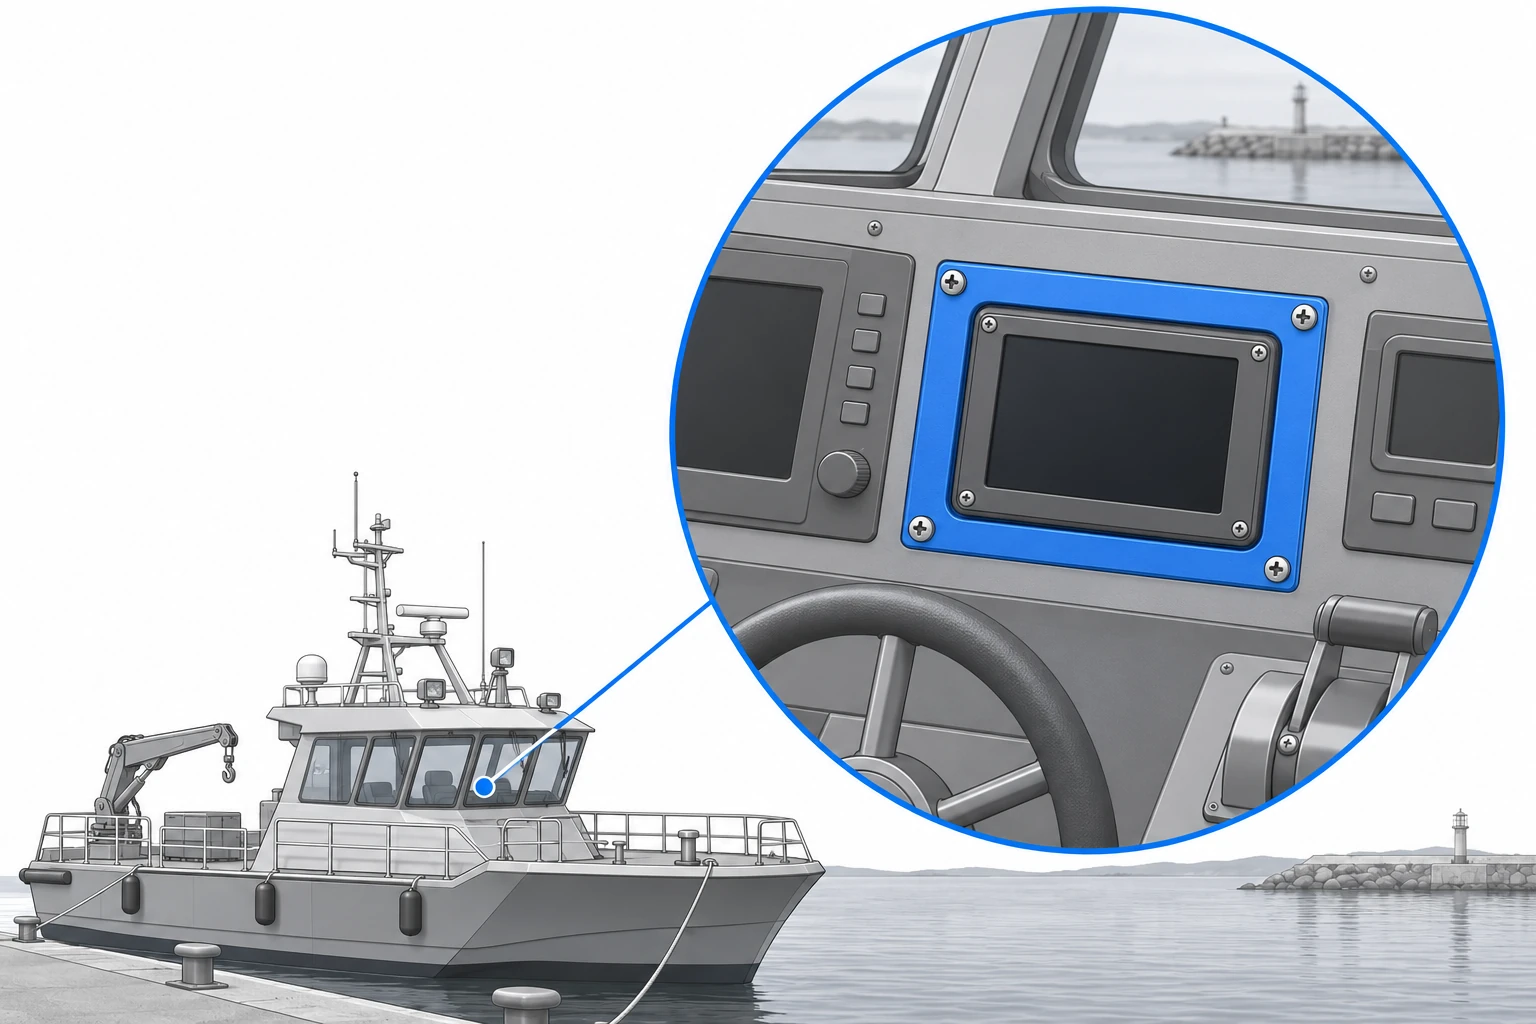
Make custom console adapters, interior components, service fixtures and equipment interfaces around the vessel you work on. GAGAT AM prints FDM and SLS parts in-house, helps choose the material and supports first-installation checks through to repeat supply.
Illustrative application concept. The highlighted part shows where custom printing can help.
A refit rarely starts with an empty space. Existing panel openings, cable routes and mounting positions often need to stay while a display, sensor or other piece of equipment changes. A custom adapter can connect the new installation to those constraints. Printing makes it practical to try the geometry before committing to the finished arrangement.
Bring us the design and the installation context. A drawing of the original opening, the replacement equipment’s dimensions and photographs of the surrounding space help define a useful part. We can help plan the print, select a suitable candidate material and make a first version for checking access, appearance and fit. The accepted design then becomes the reference for further vessels or later replacements.
Choose from engineering, specialist and flexible polymers. We plan the build direction, supports and finish around the important interfaces of your component.
Explore FDM productionMake intricate PA12 nylon components without attached support structures. We review enclosed areas for powder removal and plan the fit with surrounding parts.
Explore SLS productionBridge an existing console opening to a replacement display or control unit with a shaped bezel. Include separate fixing points for the adapter and the equipment, plus enough space for connectors behind the panel. The illustration shows this relationship in a wheelhouse concept. Gaskets, sealing faces and equipment retention must be designed and checked as part of the complete installation.
Possible grade: ASA. Consider for fitted console adapters exposed to sunlight.
Make covers, spacers, trim interfaces and cable guides around the available cabin or equipment space. Rounded edges, accessible fixings and removable sections can make installation and later servicing easier. Tell us whether the part is cosmetic, protective or load-bearing, and share any fire-performance or vessel-specific requirements before selecting the grade.
Possible grade: PC/ABS FR. Consider where the vessel’s specified fire evidence can be satisfied.
Use shaped nests, assembly guides and instrument organizers in the workshop or during refit preparation. A fixture can locate a part, protect a contact surface or keep a set of components identifiable. Define the loads, how the item will be placed and removed, and the cleaning routine. Trial the working method with representative parts before ordering further sets.
Possible grade: PET-CF17. Consider for rigid service fixtures in the shore workshop.
Sheltered interior, equipment compartment or exposed location.
Heat, loads, fluids, cleaning and expected service life.
Fit, function and any project-specific testing or documentation.
A console adapter should fit the existing opening, support the equipment and leave access to fasteners and cables. A cover in a sheltered wheelhouse faces a different job from a part exposed on deck. Share the installation details so the design reflects where it will actually work.
Tell us about sunlight, salt spray, moisture, nearby heat and cleaning products, as well as vibration and sustained loads. We help plan first parts around fit and servicing, then agree any additional checks for the finished assembly. For repeat refits, retaining the accepted design makes it easier to order the same interface again.
Consider ASA for sun-exposed covers or PC/ABS FR where documented flame behaviour is relevant. Vessel requirements guide the final choice.
Show the complete interface, including the material and thickness of the supporting panel. Keep fasteners reachable after the equipment is installed, and leave enough room for connectors, cable bends and tools. Where an adapter carries a device, define the load path into the surrounding structure. Threaded inserts or tapped features may be useful where the wall section and loading allow them.
Water exposure needs deliberate design. A printed wall or a close-fitting bezel is not, by itself, evidence of watertightness or an ingress-protection rating. Discuss gaskets, joints, drainage and the checks required for the assembled unit. For regulated or classed installations, provide the relevant vessel and component requirements early. Material documentation does not establish class approval of the finished part; any required qualification must be agreed for the project.
Define the contact faces and dimensions that position the part.
Allow access to install and tighten the chosen hardware.
Leave space to reach connectors, remove the part and inspect the assembly.
Send CAD, the equipment drawing and a photograph of the surrounding area. Include the vessel context, quantity, exposure and important fits. Explain what is changing and what existing mounting features must remain.
Review the proposed material and build approach, then check representative parts against the real opening and equipment. Confirm fastener access, cable clearance and handling. Record any revisions before accepting the design.
Retain the agreed model, material, applicable print settings and finish. Specify any batch checks and documentation when ordering. Review changes to the equipment, location or service conditions before using the part elsewhere.
A named, approved part is easier to manage than an old quotation attachment. Link the reference to the vessel, equipment family or installation it serves. Our Digital Inventory solution can keep the approved model and manufacturing configuration with the agreed price and approval period. Your team can find available approved items and order another quantity through the customer portal.
For a fleet or a recurring refit programme, tell us which installations use the same part and where their dimensions differ. A similar-looking opening does not necessarily share the same mounting pattern. Keep variants clearly identified so purchasing can choose the correct one. Digital inventory stores the part definition; manufacturing and delivery time still apply. We can discuss batch quantities and any agreed stock arrangement around your maintenance schedule.
Explore Digital InventoryKeep the opening dimensions, mounting pattern, equipment variant and accepted adapter revision together.
Confirm the panel thickness, cable access and fasteners at the next location before selecting the approved variant and quantity.
We can review a model or drawing for a suitable polymer component. If you only have a damaged sample, photographs or an incomplete drawing, contact us to discuss what design work and measurements are needed. Do not assume a visual copy reproduces the original material or approval.
Neither is automatic. Sealing depends on the design, process and assembled interfaces, and needs relevant testing. Any vessel, class or component approval is a separate project requirement. Share the intended location and specification so we can discuss the evidence needed.
Start with sunlight, temperature, moisture, salt exposure, loads and cleaning agents. We can compare candidate grades such as ASA and other engineering polymers against your brief. Confirm suitability for the actual geometry and service conditions with the agreed checks.
Yes, once the design and setup are accepted. Confirm that the openings, equipment and installation requirements match, or give each variant its own reference. We can then discuss batch quantities and approved Digital Inventory items for future orders.
Share your CAD, the equipment it connects to and the installation conditions. We will help plan the material and print, make first parts for review and retain the accepted setup for the next order.