
FDM production
Build enclosures, brackets and hoods in a material chosen for the equipment's environment. We plan supports, insert locations and accessible mating faces before production.
Explore FDM production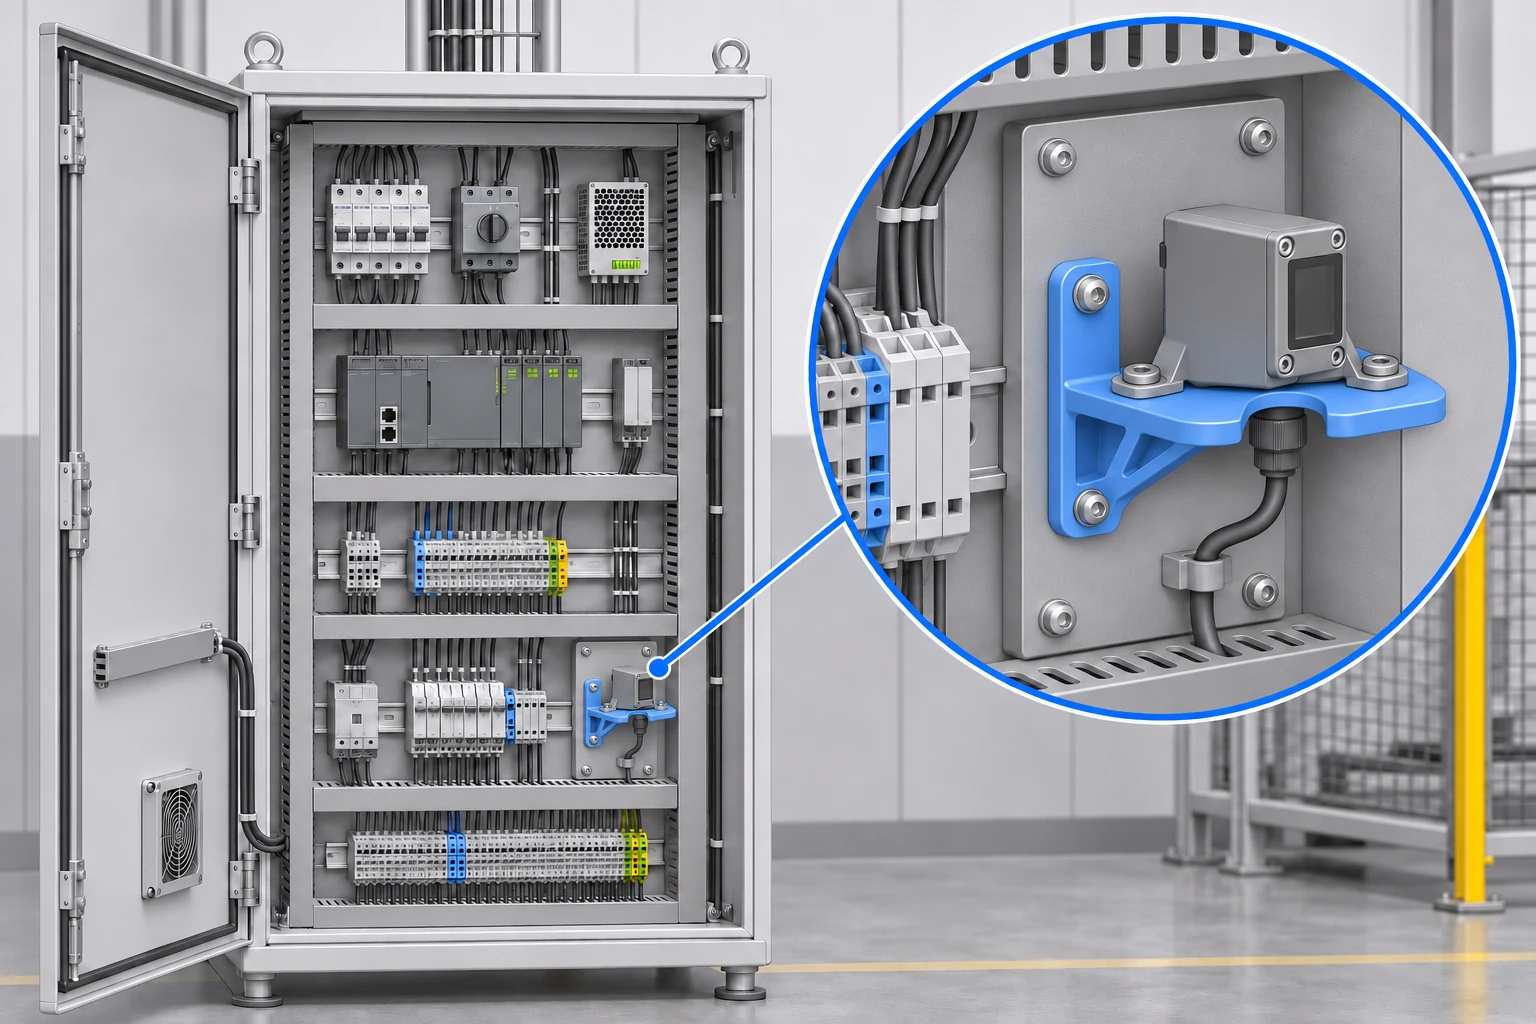
Build a housing around your electronics, adapt a sensor installation or make a practical assembly aid. GAGAT AM produces custom polymer components with in-house FDM and SLS printing, helping your team choose the material, check the fit and prepare an accepted design for repeat orders.
Illustrative application concept. The highlighted part shows where custom printing can help.
A standard enclosure can leave your team working around unused space, awkward connectors or mounting points that do not match the equipment. A custom printed part lets the geometry follow the system: board supports, cable routes, access openings and installation interfaces can be considered together.
We help turn that design into a practical component. Start with the electronics layout and the job the housing needs to do, including the operating environment and how it will be assembled. The first printed version can check packaging and access before the design is accepted for a batch. For a replacement or equipment upgrade, the same approach helps connect new hardware to an existing installation.
Build enclosures, brackets and hoods in a material chosen for the equipment's environment. We plan supports, insert locations and accessible mating faces before production.
Explore FDM productionCombine board supports, cable routes and mounting details in a PA12 nylon part. We review cleaning access and the assembly fits; electrical and environmental requirements guide suitability.
Explore SLS productionArrange openings around displays, switches and connectors while retaining access for assembly and service. Share the board envelope, mounting pattern and any sealing requirement. A printed housing can be evaluated for fit before committing to the finished version; electrical protection and environmental performance still need to be established for the complete assembly.
Possible grade: PC/ABS FR. Consider for tough covers where documented flame behaviour matters.
Shape brackets, hoods and guides around the installation space. Consider connector access, cable movement and the load carried by the mounting points. For outdoor equipment, describe sunlight, weather and temperature exposure. An open protective hood and a sealed enclosure perform different jobs, so we establish the intended function before selecting the material.
Possible grade: ASA. Consider for sensor hoods exposed to sunlight and weather.
Use shaped nests, board supports and handling fixtures to make equipment assembly more manageable. Tell us which surfaces may contact the electronics and whether static control is required. A polymer's electrical insulation does not establish static-dissipative behaviour. The fixture, material and working procedure need to match the requirements of the components being handled.
Possible grade: PA12. Consider for intricate locating geometry; specify any separate ESD requirement.
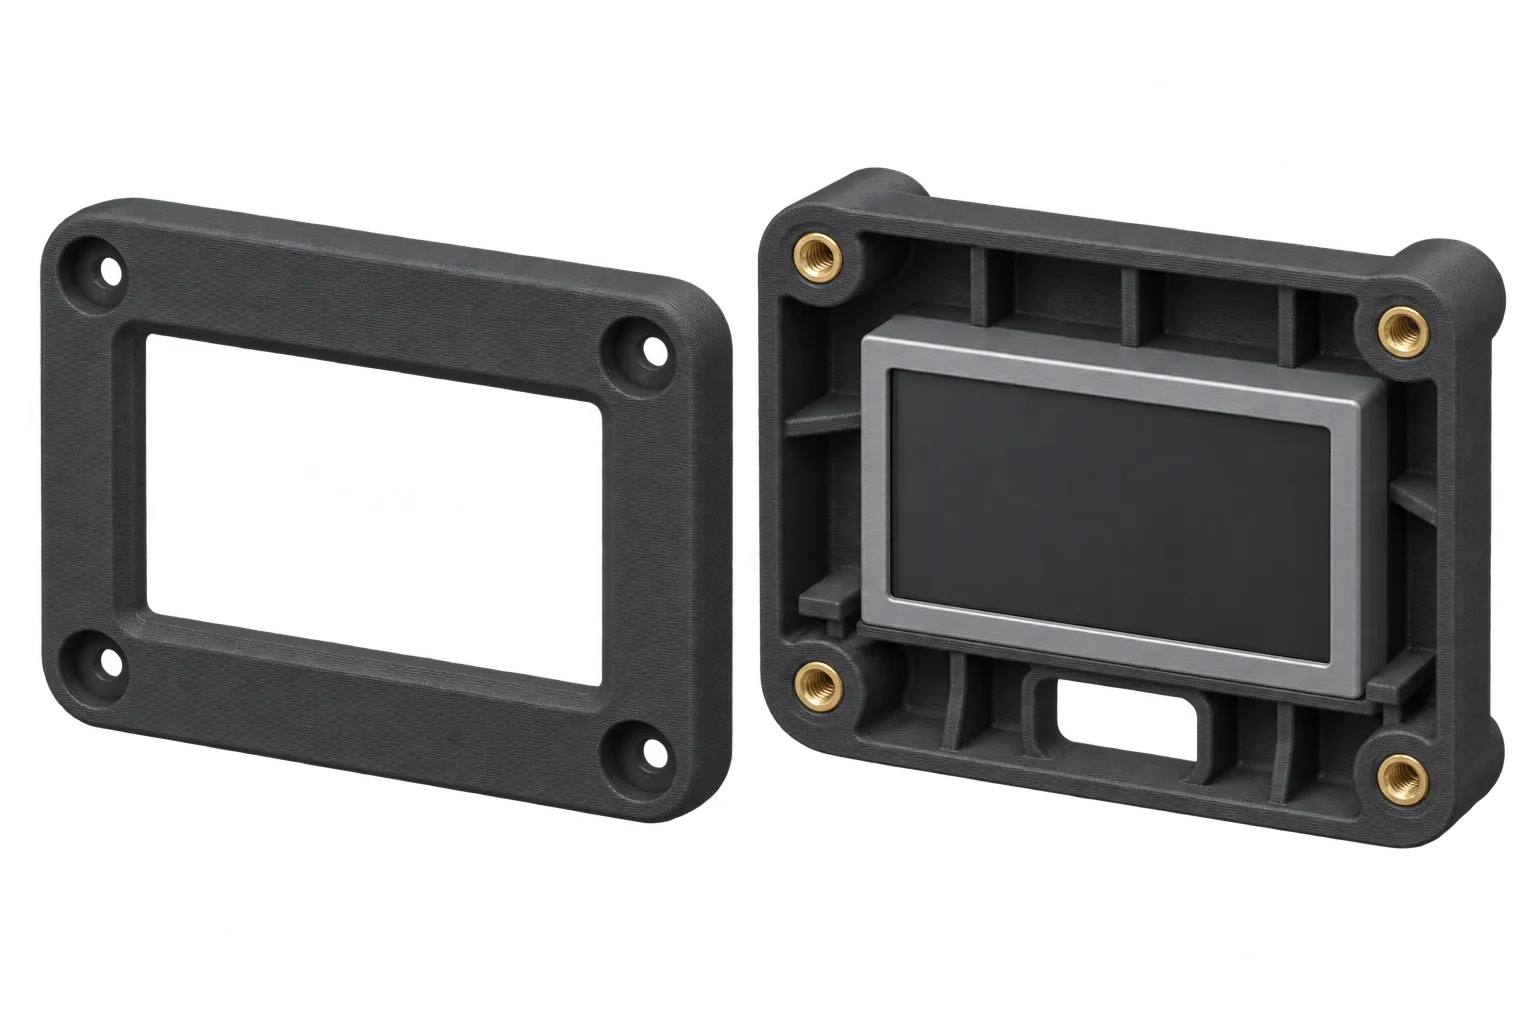
A custom enclosure can bring the display opening, cable entry, mounting points and front frame into one coordinated design. The illustrated frame has holes aligned with the inserts in the body, so the fasteners connect real mating features rather than relying on the cover alone.
Share the board outline, connector positions and surrounding installation. We help leave space for screws, tools and wiring, and plan the wall sections around the connections. Tell us about local heat, moisture and any electrical or fire-performance requirements before the first build. Sealing, shielding and static control need their own design decisions and checks.
PC/ABS FR is a candidate for this housing where toughness and documented flame behaviour matter; finished-equipment requirements still apply.
Plan the assembly sequence as carefully as the outside shape. Show how the board enters the housing, where connectors engage and how the lid is removed. In the control-enclosure illustration, the separate front frame has fixing holes aligned with the body inserts. Your own design also needs suitable screw lengths, supported bearing faces and room for the installation tool.
The sensor hood illustrates another approach: an open shelter with a downward cable route and accessible mounting slots. It does not create a sealed enclosure. We help review the process around these details, including FDM supports or SLS powder removal. Identify threads, insert pockets, gasket interfaces and important mating finishes before quotation so they can be included in the manufacturing plan.
Explore the printing guide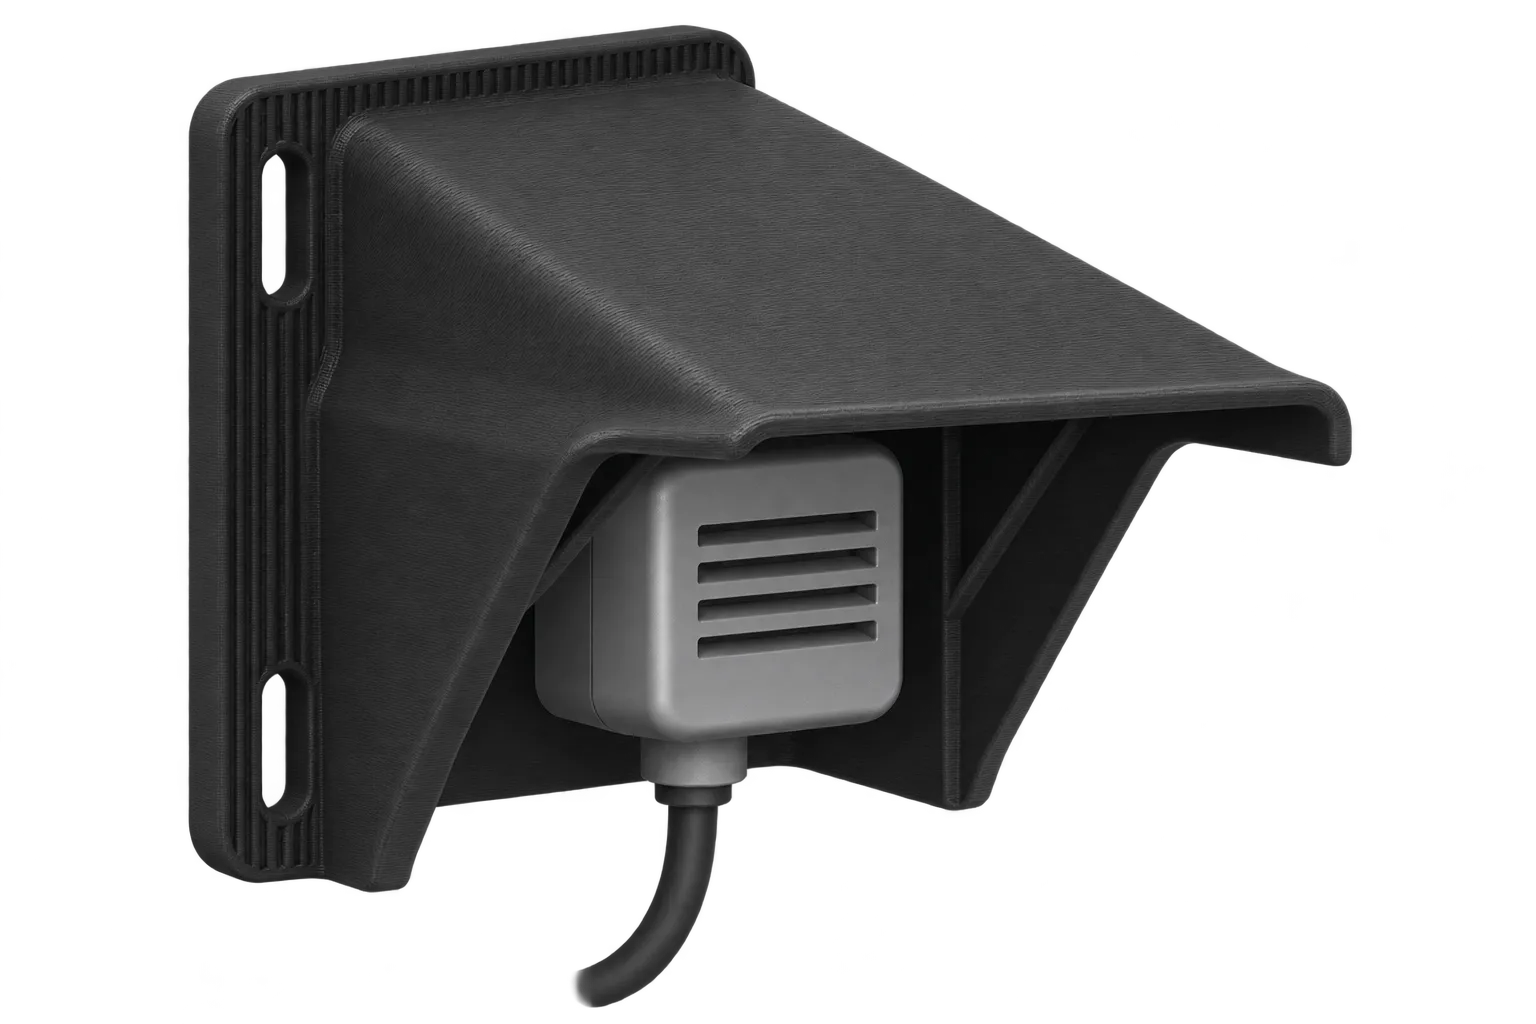
Send CAD, quantity and a drawing of critical interfaces. Describe the electronics, environment, connection method and any project-specific electrical or fire requirements.
Agree the material and preparation, then try the board, connectors, fasteners and cables in the printed housing. Record the adjustments needed before accepting the design.
Confirm the revision, finishing and checks for the batch. Keep changes to openings, material or connections visible so later orders follow the intended specification.
Equipment evolves, and a service team may need a cover long after the original development project. Give the printed component a clear part reference and revision so it can be identified without repeating the original design conversation. Our Digital Inventory solution retains approved parts and the manufacturing details needed for repeat ordering.
Available approved items can be selected through the customer portal with their agreed pricing and validity information. If a connector changes or a board grows, ask us to review the revised design before ordering. The saved library supports continuity, while our in-house production team remains available to discuss the practical effect of the change.
Explore Digital InventoryKeep the accepted board envelope, connector positions and cable-entry drawing with the enclosure revision.
Record how the lid, board and connectors are removed. A future cable or connector change may need a housing revision.
Use the equipment reference to identify the correct cover. Check the saved material and finish before reordering.
We can assess a housing with a defined sealing requirement. Printing a closed-looking shell does not establish watertightness or an IP rating. Joints, cable entries, fasteners, material and the test method all need to be considered for the assembled product.
No. A grade-specific material result supports selection within its documented scope. The complete product may have separate design, testing and conformity requirements. Tell us the required specification so we can review what the available evidence supports before production.
Raise the static-control requirement at the start of the enquiry. We need to assess the required behaviour and suitable material evidence rather than infer ESD protection from colour, reinforcement or insulation. Availability and suitability must be confirmed for the particular project.
Yes, an accepted part can be prepared for repeat supply. Digital Inventory keeps approved items identifiable with their saved setup and commercial agreement. If the design or working conditions change, request a review so the next batch reflects the correct specification.
Tell us what the part needs to do, how many you need and which requirements matter. We will help assess the manufacturing route and prepare a quotation for the agreed scope.